API là gì?
Trước khi tìm hiểu về AJAX và Fetch API, hãy hiểu khái niệm API:
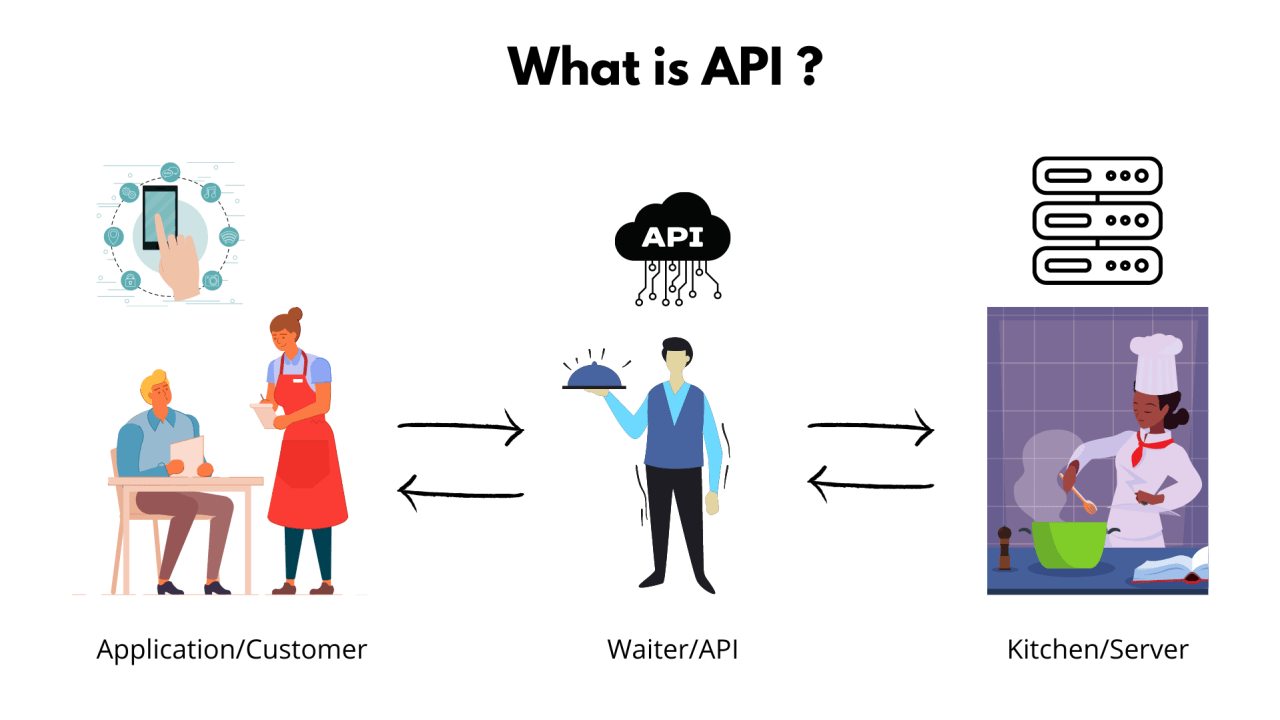
API (Application Programming Interface) giống như một “người phục vụ” kết nối giữa ứng dụng (customer) và server (kitchen). API nhận yêu cầu từ ứng dụng, chuyển đến server xử lý, và trả về kết quả.
AJAX là gì?
AJAX (Asynchronous JavaScript and XML) là một kỹ thuật phát triển web cho phép gửi và nhận dữ liệu từ server mà không cần tải lại trang. AJAX kết hợp:
- JavaScript và DOM để hiển thị và tương tác với dữ liệu
- XMLHttpRequest hoặc Fetch API để trao đổi dữ liệu bất đồng bộ với server
- HTML, CSS để hiển thị và định kiểu thông tin
- XML, JSON hoặc text để truyền dữ liệu (JSON được sử dụng phổ biến nhất hiện nay)
AJAX đã cách mạng hóa trải nghiệm web bằng cách cho phép cập nhật từng phần của trang thay vì tải lại toàn bộ, tạo ra các ứng dụng web mượt mà và phản hồi nhanh hơn.
XMLHttpRequest: Nền tảng của AJAX
XMLHttpRequest (XHR) là đối tượng JavaScript đầu tiên được sử dụng để thực hiện các yêu cầu AJAX.
Ví dụ cơ bản với XMLHttpRequest
// Tạo đối tượng XMLHttpRequest
const xhr = new XMLHttpRequest();

// Cấu hình request
xhr.open('GET', 'https://api.example.com/data', true);

// Thiết lập hàm xử lý khi trạng thái thay đổi
xhr.onreadystatechange = function() {
    // readyState 4 nghĩa là request đã hoàn thành
    if (xhr.readyState === 4) {
        if (xhr.status === 200) {
            // Xử lý dữ liệu trả về
            const data = JSON.parse(xhr.responseText);
            console.log('Dữ liệu nhận được:', data);
        } else {
            console.error('Lỗi HTTP:', xhr.status);
        }
    }
};

// Gửi request
xhr.send();
Xử lý lỗi và các event trong XMLHttpRequest
const xhr = new XMLHttpRequest();
xhr.open('GET', 'https://api.example.com/data', true);

// Sử dụng các event handler
xhr.onload = function() {
    if (xhr.status === 200) {
        const data = JSON.parse(xhr.responseText);
        console.log('Dữ liệu nhận được:', data);
    } else {
        console.error('Lỗi HTTP:', xhr.status);
    }
};

xhr.onerror = function() {
    console.error('Lỗi kết nối mạng');
};

xhr.ontimeout = function() {
    console.error('Request đã hết thời gian chờ');
};

// Thiết lập timeout 5 giây
xhr.timeout = 5000;

xhr.send();
POST request với XMLHttpRequest
const xhr = new XMLHttpRequest();
xhr.open('POST', 'https://api.example.com/users', true);
xhr.setRequestHeader('Content-Type', 'application/json');

xhr.onload = function() {
    if (xhr.status === 201) {
        const createdUser = JSON.parse(xhr.responseText);
        console.log('Người dùng đã được tạo:', createdUser);
    } else {
        console.error('Lỗi khi tạo người dùng:', xhr.status);
    }
};

const userData = {
    name: 'Nguyễn Văn A',
    email: 'nguyenvana@example.com',
    age: 30
};

xhr.send(JSON.stringify(userData));
Fetch API: Cách tiếp cận hiện đại
Fetch API là một giao diện JavaScript hiện đại dựa trên Promise để thực hiện các yêu cầu HTTP. Nó đơn giản hóa quá trình gửi request và xử lý response so với XMLHttpRequest.
GET Request với Fetch API
fetch('https://api.example.com/data')
    .then(response => {
        // Kiểm tra nếu response OK
        if (!response.ok) {
            throw new Error(`HTTP error! Status: ${response.status}`);
        }
        // Parse JSON response
        return response.json();
    })
    .then(data => {
        console.log('Dữ liệu nhận được:', data);
    })
    .catch(error => {
        console.error('Có lỗi khi fetch dữ liệu:', error);
    });
POST Request với Fetch API
const userData = {
    name: 'Nguyễn Văn B',
    email: 'nguyenvanb@example.com',
    age: 25
};

fetch('https://api.example.com/users', {
    method: 'POST',
    headers: {
        'Content-Type': 'application/json'
    },
    body: JSON.stringify(userData)
})
.then(response => {
    if (!response.ok) {
        throw new Error(`HTTP error! Status: ${response.status}`);
    }
    return response.json();
})
.then(newUser => {
    console.log('Người dùng đã được tạo:', newUser);
})
.catch(error => {
    console.error('Lỗi khi tạo người dùng:', error);
});
Các tùy chọn Fetch API
fetch('https://api.example.com/data', {
    method: 'GET', // GET, POST, PUT, DELETE, etc.
    headers: {
        'Content-Type': 'application/json',
        'Authorization': 'Bearer YOUR_ACCESS_TOKEN'
    },
    credentials: 'include', // include, same-origin, omit
    cache: 'no-cache', // default, no-cache, reload, force-cache, only-if-cached
    redirect: 'follow', // follow, error, manual
    referrerPolicy: 'no-referrer', // no-referrer, client
    mode: 'cors', // cors, no-cors, same-origin
    timeout: 5000 // NOT part of fetch API, requires AbortController
})
.then(response => response.json())
.then(data => console.log(data))
.catch(error => console.error('Error:', error));
Xử lý timeout với Fetch và AbortController
Fetch API không hỗ trợ trực tiếp timeout, nhưng bạn có thể sử dụng AbortController:
// Tạo AbortController để có thể hủy fetch
const controller = new AbortController();
const signal = controller.signal;

// Thiết lập timeout
const timeout = setTimeout(() => {
    controller.abort();
}, 5000);

fetch('https://api.example.com/data', { signal })
    .then(response => {
        // Xóa timeout vì request đã hoàn thành
        clearTimeout(timeout);

        if (!response.ok) {
            throw new Error(`HTTP error! Status: ${response.status}`);
        }
        return response.json();
    })
    .then(data => {
        console.log('Dữ liệu nhận được:', data);
    })
    .catch(error => {
        if (error.name === 'AbortError') {
            console.error('Request đã hết thời gian chờ');
        } else {
            console.error('Lỗi fetch:', error);
        }
    });
Async/Await với Fetch API
Async/await là cú pháp hiện đại giúp làm việc với Promise dễ dàng hơn, bao gồm cả Fetch API.
async function fetchData() {
    try {
        const response = await fetch('https://api.example.com/data');

        if (!response.ok) {
            throw new Error(`HTTP error! Status: ${response.status}`);
        }

        const data = await response.json();
        console.log('Dữ liệu nhận được:', data);
        return data;
    } catch (error) {
        console.error('Có lỗi khi fetch dữ liệu:', error);
    }
}

// Gọi hàm
fetchData().then(data => {
    // Làm gì đó với dữ liệu
});
Nhiều request đồng thời với Promise.all
async function fetchMultipleResources() {
    try {
        const userPromise = fetch('https://api.example.com/users').then(r => r.json());
        const postsPromise = fetch('https://api.example.com/posts').then(r => r.json());
        const commentsPromise = fetch('https://api.example.com/comments').then(r => r.json());

        // Đợi tất cả các request hoàn thành
        const [users, posts, comments] = await Promise.all([
            userPromise, postsPromise, commentsPromise
        ]);

        console.log('Users:', users);
        console.log('Posts:', posts);
        console.log('Comments:', comments);

        return { users, posts, comments };
    } catch (error) {
        console.error('Lỗi khi fetch nhiều resource:', error);
    }
}
Xử lý các request tuần tự phụ thuộc nhau
async function fetchSequentialData() {
    try {
        // Lấy danh sách người dùng
        const usersResponse = await fetch('https://api.example.com/users');
        const users = await usersResponse.json();

        // Lấy thông tin chi tiết của người dùng đầu tiên
        const userId = users[0].id;
        const userDetailResponse = await fetch(`https://api.example.com/users/${userId}`);
        const userDetail = await userDetailResponse.json();

        // Lấy bài viết của người dùng đó
        const userPostsResponse = await fetch(`https://api.example.com/users/${userId}/posts`);
        const userPosts = await userPostsResponse.json();

        return {
            user: userDetail,
            posts: userPosts
        };
    } catch (error) {
        console.error('Lỗi khi fetch dữ liệu tuần tự:', error);
    }
}
Xử lý các loại dữ liệu khác nhau
JSON (phổ biến nhất)
// Nhận dữ liệu JSON
fetch('https://api.example.com/data')
    .then(response => response.json())
    .then(data => console.log(data));

// Gửi dữ liệu JSON
fetch('https://api.example.com/data', {
    method: 'POST',
    headers: {
        'Content-Type': 'application/json'
    },
    body: JSON.stringify({ key: 'value' })
});
Text
// Nhận dữ liệu text
fetch('https://api.example.com/text')
    .then(response => response.text())
    .then(text => console.log(text));
FormData
// HTML:
// <form id="myForm">
//   <input name="username" value="user123">
//   <input name="email" value="user@example.com">
//   <input type="file" name="avatar">
// </form>

const form = document.getElementById('myForm');
const formData = new FormData(form);

// Thêm dữ liệu thủ công
formData.append('extraField', 'extraValue');

fetch('https://api.example.com/submit', {
    method: 'POST',
    body: formData // Không cần thiết lập Content-Type header
})
.then(response => response.json())
.then(result => console.log('Success:', result))
.catch(error => console.error('Error:', error));
Blob và ArrayBuffer
// Tải file nhị phân (ví dụ: hình ảnh)
fetch('https://example.com/image.jpg')
    .then(response => response.blob())
    .then(blob => {
        const imageUrl = URL.createObjectURL(blob);
        const imgElement = document.createElement('img');
        imgElement.src = imageUrl;
        document.body.appendChild(imgElement);
    });

// Tải dữ liệu dạng ArrayBuffer
fetch('https://example.com/binary-data')
    .then(response => response.arrayBuffer())
    .then(buffer => {
        // Xử lý dữ liệu nhị phân
        const dataView = new DataView(buffer);
        console.log('First byte:', dataView.getUint8(0));
    });
Sự khác biệt giữa XMLHttpRequest và Fetch API
| Tính năng | XMLHttpRequest | Fetch API |
|---|---|---|
| API | Kiểu đối tượng cũ | Dựa trên Promise |
| Cú pháp | Dài dòng, nhiều callback | Ngắn gọn, dễ đọc |
| Hủy request | Hỗ trợ trực tiếp | Sử dụng AbortController |
| Timeout | Hỗ trợ trực tiếp | Cần AbortController |
| Progress event | Hỗ trợ tốt | Hạn chế hơn |
| JSONP | Có thể thực hiện | Không hỗ trợ |
| Trình duyệt | Hỗ trợ rộng rãi | IE không hỗ trợ |
Xây dựng lớp Service API
Một cách tiếp cận hiện đại là xây dựng một lớp Service API để đóng gói và tái sử dụng logic gọi API:
class ApiService {
    constructor(baseUrl) {
        this.baseUrl = baseUrl;
        this.defaultHeaders = {
            'Content-Type': 'application/json',
            'Accept': 'application/json'
        };
    }

    // Thiết lập token xác thực
    setAuthToken(token) {
        this.authToken = token;
    }

    // Tạo các headers cho request
    createHeaders(customHeaders = {}) {
        const headers = { ...this.defaultHeaders, ...customHeaders };

        if (this.authToken) {
            headers['Authorization'] = `Bearer ${this.authToken}`;
        }

        return headers;
    }

    // Phương thức request chung
    async request(endpoint, options = {}) {
        const url = this.baseUrl + endpoint;

        const fetchOptions = {
            method: options.method || 'GET',
            headers: this.createHeaders(options.headers),
            ...options
        };

        if (options.body && typeof options.body === 'object') {
            fetchOptions.body = JSON.stringify(options.body);
        }

        try {
            const response = await fetch(url, fetchOptions);

            // Xử lý response theo kiểu dữ liệu
            let data;
            const contentType = response.headers.get('content-type');

            if (contentType && contentType.includes('application/json')) {
                data = await response.json();
            } else {
                data = await response.text();
            }

            // Xử lý lỗi HTTP
            if (!response.ok) {
                throw {
                    status: response.status,
                    statusText: response.statusText,
                    data
                };
            }

            return data;
        } catch (error) {
            console.error('API request failed:', error);
            throw error;
        }
    }

    // Các phương thức tiện ích
    async get(endpoint, options = {}) {
        return this.request(endpoint, { ...options, method: 'GET' });
    }

    async post(endpoint, body, options = {}) {
        return this.request(endpoint, { ...options, method: 'POST', body });
    }

    async put(endpoint, body, options = {}) {
        return this.request(endpoint, { ...options, method: 'PUT', body });
    }

    async patch(endpoint, body, options = {}) {
        return this.request(endpoint, { ...options, method: 'PATCH', body });
    }

    async delete(endpoint, options = {}) {
        return this.request(endpoint, { ...options, method: 'DELETE' });
    }
}

// Sử dụng lớp ApiService
const api = new ApiService('https://api.example.com');

// Thiết lập token nếu người dùng đã đăng nhập
api.setAuthToken(localStorage.getItem('authToken'));

// Sử dụng để gọi API
async function fetchUsers() {
    try {
        const users = await api.get('/users');
        console.log('Users:', users);
        return users;
    } catch (error) {
        console.error('Error fetching users:', error);
        throw error;
    }
}

// Tạo người dùng mới
async function createUser(userData) {
    try {
        const newUser = await api.post('/users', userData);
        console.log('Created user:', newUser);
        return newUser;
    } catch (error) {
        console.error('Error creating user:', error);
        throw error;
    }
}
Xử lý lỗi và Loading State
Trong ứng dụng thực tế, việc xử lý trạng thái tải và lỗi là rất quan trọng:
// Giả sử chúng ta có các phần tử DOM sau:
// <div id="users-container"></div>
// <div id="loading-indicator" class="hidden">Loading...</div>
// <div id="error-message" class="hidden"></div>

const usersContainer = document.getElementById('users-container');
const loadingIndicator = document.getElementById('loading-indicator');
const errorMessage = document.getElementById('error-message');

async function loadUsers() {
    // Hiển thị loading indicator
    loadingIndicator.classList.remove('hidden');
    // Ẩn thông báo lỗi trước đó nếu có
    errorMessage.classList.add('hidden');
    // Xóa nội dung cũ
    usersContainer.innerHTML = '';

    try {
        const users = await api.get('/users');

        // Hiển thị danh sách người dùng
        users.forEach(user => {
            const userElement = document.createElement('div');
            userElement.classList.add('user-card');
            userElement.innerHTML = `
                <h3>${user.name}</h3>
                <p>Email: ${user.email}</p>
                <p>Phone: ${user.phone}</p>
            `;
            usersContainer.appendChild(userElement);
        });
    } catch (error) {
        // Hiển thị thông báo lỗi
        errorMessage.textContent = `Lỗi: ${error.status === 401
            ? 'Bạn không có quyền truy cập'
            : 'Không thể tải dữ liệu người dùng'}`;
        errorMessage.classList.remove('hidden');
    } finally {
        // Ẩn loading indicator
        loadingIndicator.classList.add('hidden');
    }
}

// Gọi hàm khi trang tải xong
document.addEventListener('DOMContentLoaded', loadUsers);
Ví dụ thực tế: Xây dựng một ứng dụng Weather App
Dưới đây là ví dụ về một ứng dụng thời tiết đơn giản sử dụng Fetch API để lấy dữ liệu từ OpenWeatherMap API:
HTML
<!DOCTYPE html>
<html lang="en">
<head>
    <meta charset="UTF-8">
    <meta name="viewport" content="width=device-width, initial-scale=1.0">
    <title>Weather App</title>
    <style>
        body {
            font-family: 'Segoe UI', Tahoma, Geneva, Verdana, sans-serif;
            background-color: #f5f5f5;
            margin: 0;
            padding: 0;
            display: flex;
            justify-content: center;
            align-items: center;
            min-height: 100vh;
            background-image: linear-gradient(to right, #74ebd5, #ACB6E5);
        }

        .container {
            background-color: white;
            border-radius: 10px;
            box-shadow: 0 10px 20px rgba(0,0,0,0.1);
            width: 90%;
            max-width: 400px;
            overflow: hidden;
        }

        .search-box {
            display: flex;
            padding: 15px;
            background-color: #f0f0f0;
        }

        .search-box input {
            flex: 1;
            padding: 10px;
            border: none;
            border-radius: 4px 0 0 4px;
            font-size: 16px;
        }

        .search-box button {
            border: none;
            background-color: #4CAF50;
            color: white;
            padding: 10px 15px;
            border-radius: 0 4px 4px 0;
            cursor: pointer;
        }

        .weather-info {
            padding: 20px;
            text-align: center;
        }

        .city {
            font-size: 24px;
            font-weight: bold;
            margin-bottom: 5px;
        }

        .date {
            color: #888;
            margin-bottom: 20px;
        }

        .temperature {
            font-size: 48px;
            font-weight: bold;
            margin-bottom: 10px;
        }

        .description {
            font-size: 18px;
            margin-bottom: 20px;
            text-transform: capitalize;
        }

        .details {
            display: flex;
            justify-content: space-around;
            margin-top: 30px;
            padding-top: 20px;
            border-top: 1px solid #eee;
        }

        .detail {
            text-align: center;
        }

        .detail-label {
            font-size: 12px;
            color: #888;
        }

        .detail-value {
            font-size: 18px;
            font-weight: bold;
        }

        .loading {
            text-align: center;
            padding: 20px;
            font-style: italic;
            color: #888;
        }

        .error {
            text-align: center;
            padding: 20px;
            color: #e74c3c;
        }

        .hidden {
            display: none;
        }
    </style>
</head>
<body>
    <div class="container">
        <div class="search-box">
            <input type="text" id="city-input" placeholder="Nhập tên thành phố...">
            <button id="search-btn">Tìm</button>
        </div>

        <div id="loading" class="loading hidden">Đang tải dữ liệu...</div>
        <div id="error" class="error hidden">Không tìm thấy thành phố. Vui lòng thử lại!</div>

        <div id="weather-data" class="weather-info hidden">
            <div class="city" id="city">Hà Nội, VN</div>
            <div class="date" id="date">Thứ Sáu, 26 tháng 9, 2025</div>

            <div class="temperature"><span id="temp">25</span>°C</div>
            <div class="description" id="description">Trời nhiều mây</div>

            <div class="details">
                <div class="detail">
                    <div class="detail-label">Độ ẩm</div>
                    <div class="detail-value"><span id="humidity">70</span>%</div>
                </div>
                <div class="detail">
                    <div class="detail-label">Gió</div>
                    <div class="detail-value"><span id="wind">5</span> m/s</div>
                </div>
                <div class="detail">
                    <div class="detail-label">Áp suất</div>
                    <div class="detail-value"><span id="pressure">1012</span> hPa</div>
                </div>
            </div>
        </div>
    </div>

    <script src="app.js"></script>
</body>
</html>
JavaScript (app.js)
document.addEventListener('DOMContentLoaded', () => {
    const API_KEY = 'your_openweathermap_api_key'; // Thay bằng API key của bạn
    const cityInput = document.getElementById('city-input');
    const searchBtn = document.getElementById('search-btn');
    const loadingIndicator = document.getElementById('loading');
    const errorMessage = document.getElementById('error');
    const weatherData = document.getElementById('weather-data');

    // Elements for displaying weather data
    const cityElement = document.getElementById('city');
    const dateElement = document.getElementById('date');
    const tempElement = document.getElementById('temp');
    const descriptionElement = document.getElementById('description');
    const humidityElement = document.getElementById('humidity');
    const windElement = document.getElementById('wind');
    const pressureElement = document.getElementById('pressure');

    // Format date
    const formatDate = (date) => {
        const days = ['Chủ Nhật', 'Thứ Hai', 'Thứ Ba', 'Thứ Tư', 'Thứ Năm', 'Thứ Sáu', 'Thứ Bảy'];
        const months = ['tháng 1', 'tháng 2', 'tháng 3', 'tháng 4', 'tháng 5', 'tháng 6',
                        'tháng 7', 'tháng 8', 'tháng 9', 'tháng 10', 'tháng 11', 'tháng 12'];

        return `${days[date.getDay()]}, ${date.getDate()} ${months[date.getMonth()]}, ${date.getFullYear()}`;
    };

    // Fetch weather data function
    const fetchWeatherData = async (city) => {
        // Show loading indicator
        loadingIndicator.classList.remove('hidden');
        errorMessage.classList.add('hidden');
        weatherData.classList.add('hidden');

        try {
            const response = await fetch(
                `https://api.openweathermap.org/data/2.5/weather?q=${city}&appid=${API_KEY}&units=metric&lang=vi`
            );

            if (!response.ok) {
                throw new Error('City not found');
            }

            const data = await response.json();

            // Update UI with weather data
            cityElement.textContent = `${data.name}, ${data.sys.country}`;
            dateElement.textContent = formatDate(new Date());
            tempElement.textContent = Math.round(data.main.temp);
            descriptionElement.textContent = data.weather[0].description;
            humidityElement.textContent = data.main.humidity;
            windElement.textContent = data.wind.speed;
            pressureElement.textContent = data.main.pressure;

            // Show weather data
            weatherData.classList.remove('hidden');
        } catch (error) {
            console.error('Error fetching weather data:', error);
            errorMessage.classList.remove('hidden');
        } finally {
            // Hide loading indicator
            loadingIndicator.classList.add('hidden');
        }
    };

    // Event listener for search button
    searchBtn.addEventListener('click', () => {
        const city = cityInput.value.trim();
        if (city) {
            fetchWeatherData(city);
        }
    });

    // Event listener for Enter key press
    cityInput.addEventListener('keyup', (event) => {
        if (event.key === 'Enter') {
            const city = cityInput.value.trim();
            if (city) {
                fetchWeatherData(city);
            }
        }
    });

    // Default city on page load (optional)
    // fetchWeatherData('Hanoi');
});
Các Best Practice khi làm việc với AJAX và Fetch API
1. Luôn xử lý lỗi
fetch('https://api.example.com/data')
    .then(response => {
        if (!response.ok) {
            throw new Error(`HTTP error! Status: ${response.status}`);
        }
        return response.json();
    })
    .then(data => {
        // Xử lý dữ liệu
    })
    .catch(error => {
        // Xử lý lỗi đầy đủ
        console.error('Error:', error);
    });
2. Hiển thị trạng thái loading
const loadData = async () => {
    // Show loading state
    document.getElementById('loading').classList.remove('hidden');

    try {
        const data = await fetchData();
        renderData(data);
    } catch (error) {
        handleError(error);
    } finally {
        // Hide loading state
        document.getElementById('loading').classList.add('hidden');
    }
};
3. Thêm timeout cho request
const fetchWithTimeout = (url, options = {}, timeout = 5000) => {
    return Promise.race([
        fetch(url, options),
        new Promise((_, reject) =>
            setTimeout(() => reject(new Error('Request timed out')), timeout)
        )
    ]);
};
4. Tái sử dụng logic fetch
// Tạo một helper function
const apiRequest = async (url, options = {}) => {
    const response = await fetch(url, options);

    if (!response.ok) {
        throw new Error(`HTTP error! Status: ${response.status}`);
    }

    return response.json();
};

// Sử dụng
const getUsers = () => apiRequest('https://api.example.com/users');
const getUserById = (id) => apiRequest(`https://api.example.com/users/${id}`);
5. Debounce tìm kiếm
// Debounce function
function debounce(func, delay) {
    let timeout;
    return function() {
        const context = this;
        const args = arguments;
        clearTimeout(timeout);
        timeout = setTimeout(() => func.apply(context, args), delay);
    };
}

// Search function
const searchInput = document.getElementById('search');
const performSearch = debounce(function(event) {
    const query = event.target.value;
    if (query.length >= 3) {
        fetchSearchResults(query);
    }
}, 300);

searchInput.addEventListener('input', performSearch);
Kết luận
AJAX và Fetch API là các công nghệ cốt lõi cho phát triển web hiện đại, cho phép tạo ra các ứng dụng web động và phản hồi nhanh. Fetch API cung cấp một giao diện hiện đại, dễ sử dụng hơn so với XMLHttpRequest truyền thống.
Trong bài viết này, chúng ta đã tìm hiểu:
- Cơ bản về AJAX và XMLHttpRequest
- Fetch API và cách sử dụng
- So sánh giữa XMLHttpRequest và Fetch API
- Làm việc với async/await và Promise
- Xử lý các loại dữ liệu khác nhau
- Xây dựng lớp Service API
- Xử lý lỗi và loading state
- Ứng dụng thực tế với Weather App
- Best practices khi làm việc với AJAX và Fetch API
Với những kiến thức này, bạn có thể xây dựng các ứng dụng web hiện đại với khả năng tương tác cao với backend server.